Tuesday, October 20, 2015

Kwik Sew 2017 Sweatshirt


I wanted a nice comfy sweatshirt for kicking around the house. I saw Jalie’s pattern 3355
Jalie 3355
and thought that would be a perfect choice. However, did I really want to buy yet another pattern? Not really. And I wanted to get rid of the things in my stash.

I was given a bunch of old patterns from my fellow Beaver Leader’s wife. In that stash there was an old Kwik Sew pattern, 2017.
This would work. I chose style A, hoping it would not be too large.


I had this soft comfy pink material that would be perfect for a sweatshirt. I had bought it about 3 years ago at Fabricville for dirt cheap. This purchase was intended for a quick easy project to help build my skills. It was not for anything monumental, as it is not the best quality.

I cut out a small as my measurements lay right at the end of the small. I find that this pattern runs large, and I will try an X-Small next time. The pattern was uncut so it will be a quick job retracing the pattern.

It is a quick and simple process to put together. Carefully mark the front and back as it can be confusing which pieces are which. Even the arms are wide and you can get them confused with the front piece.

I added an extra step of topstitching my cuffs/bands. I like the finished look of it.
I was super tired and I wanted to get this finished for my trip the next day to Ottawa. I attached one cuff band incorrectly. I picked out my stitches and I reattached it. The second time I still managed to attach it incorrectly. This weekend I will shorten the arms and reattach the cuffs properly. I find the arms a tad too long anyways.


All in all this is a perfect pattern. Simple, comfy and it has the option of a hood and a kangaroo pouch. The pattern even has sweatpants! The pattern runs large. I should have measured my favorite sweatshirt to see how it measured up to the pattern pieces for small, but whatever! I will just have to make another one!

Thursday, October 15, 2015

Older Kwik Sew Patterns

I was fortunate enough to be given some older Kwik Sew patterns. The majority were for boys and men. Seeing as styles come and go I will see which ones can be used. They are all uncut patterns. She included the copied patterns, but they are all too big for our needs and the grain line was not transferred on. I prefer to copy my own patterns. I want to adjust for our height etc, as it seem the previous person took note of inseams and other measurements.


Monday, October 12, 2015

Fancy Pants Leggings by Titchy Threads

So how hard is it to find a pattern for boy’s pyjama leggings? Apparently VERY hard! I could not find one single pattern for knit leggings for boys. Sure, there are many girl patterns out there for leggings. But a boy’s shape is different. I wanted to find a pattern with an extra panel in the bum.  One where I can have cuffs at the bottom with an elastic waist. I am sure I could draft one myself, but I did not feel like. Hey, it’s not like I don’t have a Zillion and one things to do in my life, n’est pas?

So to the internet I troll. Searching websites, googling boys leggings. NOTHING. Until I found Titchy Threads. They have exactly what I want, Fancy Pants Leggings. I can make long PJ bottoms of short PJ bottoms for the summer. P-E-R-F-E-C-T. Except it is online download only and PDF. I am not a fan of taping my pattern together, but at 47 pages long it is well detailed. This pattern is like a sewing class in itself. If you never made anything with knits or elastics, you would have ample information to guide you expertly through. 
Their website describes this pattern as:
"The Fancy Pants Leggings are close fitting leggings with a separate bum panel. The panel gives extra room in the rear for little ones in nappies and a chance to use contrast fabrics and treasured scraps or to feature your own designs. Suitable for both boys and girls, the leggings can be used for daywear, an extra layer in winter or pyjamas."

The pattern includes two different ankle finishes, Shorts, two different waistband styles and width adjustment. If you print in color it is like the new Jalie patterns. Each size has a different color. And the sizes 0-3 month to 4T are in one pattern cutout and sizes 5 - 10 are on another pattern cutout. 

I did a test with the size 7. It was a good thing as the size 7 was a bit snug. A size 8 would be best. When I was sewing the kids were jumping up and down screaming for attention. I did not read first and it turns out you need to cut the fabric out on a single layer. The leg pattern you are supposed to cut out the 2nd on flipping the pattern. This was just a test, so no biggy. 

This time I cut out a size 8 and I cut 2 leg pattern pieces. This is the great thing about digital patterns. I can print it off and cut the size I need. NO tracing! Yippee! 


 The cut out and sewing took about an hour.I made one mistake, I put the elastic on backwards. The material is too delicate to remove the stitches.


These are the first attempt and they are PJ bottoms. I have enough material leftover from the grey for shorts and I have the blue material.

These PJ bottoms are exactly what I was looking for. Funny this pattern would be so hard to find. None of the Big 4 companies have them for boys. Then again, they have NOTHING for boys!


Saturday, October 3, 2015

Children's belt

When our first was born almost 8 years ago we discovered that kids clothes do not fit everyone. We are, let us say, short people. We are tiny, small people who do not fit in regular clothes. We have passed this down to our children. I was tired of seeing diapers, pants sagging down.

By having the belt in the back only it makes it easier for the kids to take on and off their pants. This is especially important during the potty training days!

That is when Simon made us this cool belt that attaches to the back of the pants through the belt loops.


Our good friends have just the opposite problem, they are super tall and slender. I have been meaning to give them belts like this for the past few years. We are meeting them today so Friday night was the last night we had to do it.

 On my lunch hour I got the supplies


We had the snap tools


Simon cut the belt to the desired length and sealed the ends (he used a lighter to burn the ends)


He folded over the ends and sewed. He did not need to do this step if you don't want to sew, he just likes extra details. 

Now we don't know what size size she needs, so we made snaps every 1 1/2 inches apart. This way no matter what pants she wears the belt will work.


You can do it whatever distance you need


Now there is something we did not know about the snap tools. The tool brand you buy will only work wit their brand of snaps. We broke our tools, and ended up going to Club Tissus Friday night after Scouts. They have the machines to use for free if you are a member.

While there I ended up buying a new pattern Jalie 3138 to make the biketard for hot yoga. Ooops.


So here is the finished product, We made 3 of them


Hopefully it is long enough for her. I don't even know what size she wears, but I am sure if it is not big enough we will find a way to make another one :)

Friday, October 2, 2015

DIY ironing table

Do you ever get annoyed at ironing your material on a flimsy ity-bity ironing board? Well, I do! ALL THE TIME! This is where being with a carpenter really pays off, especially one that sews with you. I asked him to make me a tabletop that can convert to an ironing surface. One trip to Club Tissue and Rona, and voila! An ironing table is born.


Simon made this awesome sewing.cutting table for me. There is ample storage for my patterns, fabric and notions. It is the perfect height for drafting patterns and cutting out fabric. Plus the whole thing is on wheels and can be easily moved when I need the space.


Now what I want is an ironing surface that can accommodate my uncut fabric. It is so annoying to iron several meters of uncut fabric on a regular ironing board. The board is way too small, the board rocks back and forth hen I move the fabric and it is time consuming to constantly move fabric, and there are always creases when I iron. I took a look at the $$$ ironing boards and I was not convinced that it would be worth it. Sorry, I am cheap, what can I say? Several google searches later I have a plan! Buy 2 layers of felt, 3/4 inch plywood, 1 layer of muslin (it is called yellow cotton in French - coton jaune) and Simon has a project!

We needed to buy plywood to finish the top of a file cabinet, so a piece that will fit this table will have enough leftover to do both projects. Win-Win. 


The first thing Simon did was round the edges of the plywood. The last thing you want is a pointy edge that will tear your fabric.


This gave the piece a nice finished detail to it.


As you can see it is a nice LONG peice of wood


Now comes the fun part! Staple gun! We stapled 2 layers of felt to the board.
 
Make sure you pull tightly as you staple the material. This is where a 2nd person helping comes in handy. I helped, so I can take credit for building this with Simon. This was his first building project since his amputation, and he did very well. He did not need me, I was just a bonus.


Take care when folding the corners


You do not want to bulky of a corner. We are having 3 layers of fabric, so lay it as flat as possible.

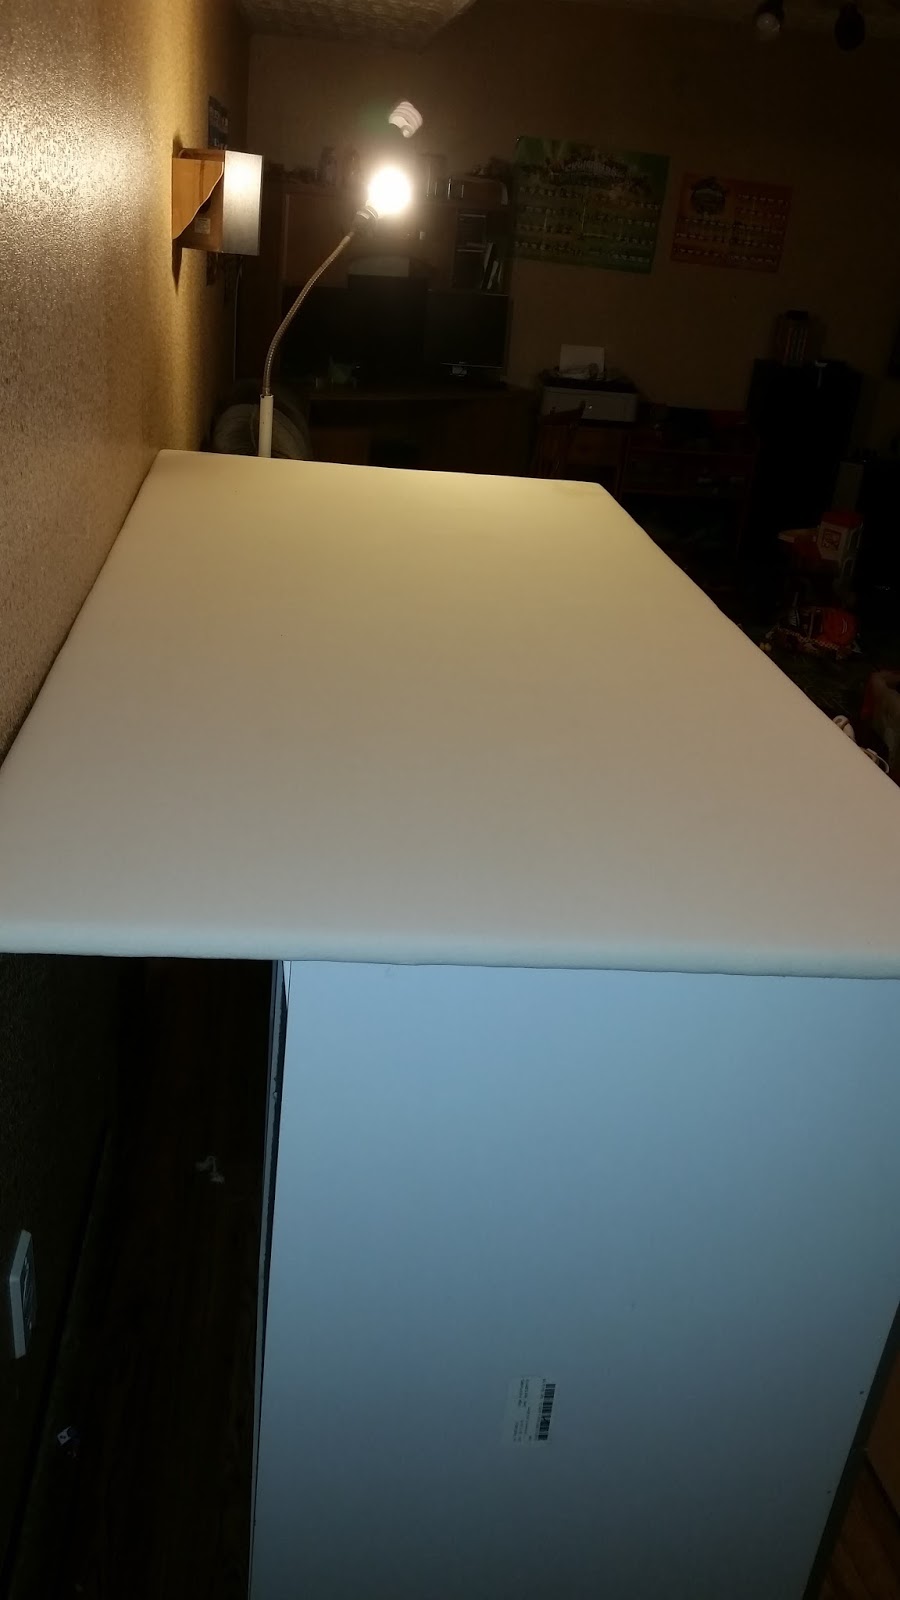
Now that there were 2 layers of felt it was time for the muslin to go on top. We washed our material and it shrank a bit. It fit JUST RIGHT. There was not much to wrap at one end, but we did it.


Here is my beautiful table!


The board is wider than the cabinets. Simon secured the board to the table and he used brackets along the side.


The fact that he screwed it on means that when we need to replace the muslin we can easily remove the top and replace the fabric. And as a bonus it make the board flat. The board curved a bit so this evened it all out.


 We have a large piece of cardboard that covers the entire surface. We may use this instead of our old pin board.


As you can see the pin board curves and does not lie flat. I am sure that Simon and I will figure something out. Now on to Halloween sewing!

What do you think of Simon's (and mine) handywork? Let a comment and let Simon know he rocks! I tell him all the time, but he deserves his credit, n'est pas?

Wednesday, September 30, 2015

Fall sewing

So I did not end up making that cardigan. However, I did make an Angry Bird PJ bottom and a pair of nylon rain pants for Tyler. Simon and I had bought the nylon material a few years ago when we needed rain pants in the fall. For some reason they only sold rain pants in the Spring, as if it never rains in the Fall. Right after buying all the material I found rain pants a Joe Fresh at Maxi, of all places. So that bag of material was put aside.


Simplicity Unisex Pajamas and knit top 9499

Don't you just love quick and easy projects to get your sewing mojo back? I used Simplicity 9499. This pattern has a nice loose fit to it. It is easy to modify the elastic in the waist and the length in the leg. I use this pattern for all his PJ bottoms and now his rain pants.


I made the hem super simple, and a bit long. The waist was made a bit looser to fit over his pants. I measured his waist while he was wearing his pants so it is a perfect fit. 


The angry bird material is left over from Tonitex. I had previously made Tyler a PJ bottom, but he is outgrowing those and I have oodles of fabric leftover. It is a nice lightweight fabric.

 All in all this pattern is very versatile, quick and easy. Boys are not complicated. Well, when it comes to clothing my boys are not that complicated. Let's see if at 14 they will be caught dead wearing my home made clothes!

Monday, July 13, 2015

Sewing has taken a break due to LIFE

So I have taken a break from sewing for a little while due to the fact that life is B-U-S-Y! My sewing machines were mocking me. So yesterday I traced a pattern I want to sew, Jalie 3353. I had this pattern and fabric since last year, so it is about time! Plus it is a super easy and straightforward pattern. I will post my progress, Hopefully it doesn't just sit there!


Oh, and there is another sad reason why I took a break from sewing, Simon had a terrible work accident and lost 2 of his fingers. He's healing well, but I lost a great helper and inspiration. I will get him involved in this project and he even plans on taking a sewing class with me this fall. I still can't believe that something like this happened to him!